How to make progress in your yoga practice.

The Two Wings of Practice

Students often ask me how long it is going to take them to be able to achieve a certain pose or goal they have set for themselves.  The short answer comes from Patthabi Jois and goes like this: “Practice, practice and all is coming.”

There is the literal interpretation of this aphorism that most yoga students want to believe and that is to keep practicing and you will achieve your goal.

However, Patthabi Jois does not say to keep practicing and your results are guaranteed.  By telling us to keep practicing he lets us know that wisdom can be accrued and through wisdom, discrimination.  The teachings of the Bhagavad Gita tell us to practice for the sake of practice but not be attached to the fruits of our practice.  It also warns us to not be attached to inaction.  This means that you are not guaranteed that if you practice a pose repeatedly that you will be able to achieve it.  It also means that if you don’t practice regularly, progress will be elusive.

How do you practice?  One way is to come to public yoga classes.  These are great, but you are at the whim of practicing whatever the teacher wants you to practice, not what you as an individual might need.  Also, sometimes teachers avoid certain poses for a variety of reasons.  Those poses might be beneficial for you.

It is important to practice with a teacher who doesn’t practice with you, but one who watches over you and corrects your postures, someone who has walked the path before you and knows the pitfalls and the problems.  We are blind to our own mistakes and sometimes we think we are doing something, but we are often, but not always, mistaken.  I know this has been true for me and the corrections I have received from a knowledgeable teacher have transformed my practice in a minute.  Practicing the same mistake over and over can take years to figure out and may even cause injury.

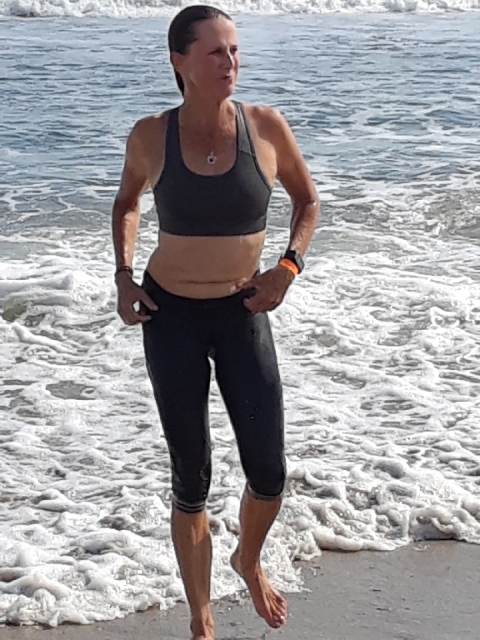
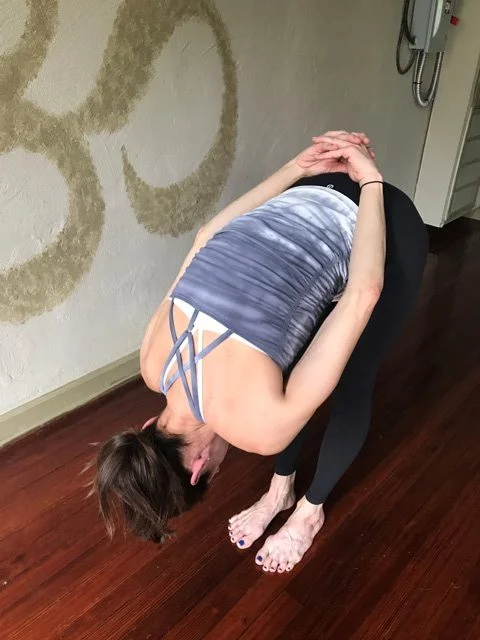
To make progress in your yoga postures, it is also important to develop your own practice.  Originally, yoga was taught individually because everybody has different needs due to their physical structure, habits and restrictions.  I find that I need to do certain poses, stretches, strengthening exercises, or particular  actions every day as part of my own "physical therapy" program.  This would be beneficial for all serious yoga students.  It takes a lot of discipline to do this, but it doesn’t have to take that much time; 10 to 20 minutes may be enough.  You may be surprised that getting to your mat can be hard, but once you are on your mat 20 minutes can easily stretch into an hour!

By practicing on your own, you start to find out what you don’t know.  You may start to realize that if no one is telling you what to do with your leg, foot or arm, you suddenly realize that it could be in a myriad of positions.  This is good!  The next time you take a class, you will pay more attention to those details that you thought you knew.

Just as a bird needs two wings to fly straight, you need two wings to your practice.  Working on your own is one wing of practice, the other is to practice with a knowledgeable teacher.    These are the two wings complement each other and help you make progress on the path of yoga.

Privates

Private yoga sessions are a good way to get some very individualized attention and take your understanding and practice to the next level. You can often learn something in one private session that might take you years to muddle through on your own. (That has happened to me!) It’s an opportunity to ask questions about your particular body and your poses without worrying that you are the only one who doesn’t understand or get something.Privates are often prohibitively expensive and not sustainable for the average yoga student. However, have you ever thought about sharing the cost of a yoga private with a friend or a small group of friends?Semi-privates are often a great way to dive into your most burning questions in a safe and non-threatening venue. If you split the cost of a private among 4 people, the cost ends up being only a few dollars more than a regular yoga class.I have some space in my schedule to book a few extra privates during the summer:

  • Monday and Friday mornings at 7:30 or Thursdays at 11:30 at the Solebury Club.

  • Tuesdays at 11:30 or 2:30 at Cornerstone in Doylestown.

  • Fridays at 11:00 (at Cornerstone, New Hope)

  • If an evening time works better for you, please e-mail for times. I currently have Tuesday and Wednesday evenings available. At my house.

For rates and to book a private email me here: mkeisen@verizon.net

First Annual Food/Restaurant Review

Hey, a yogi has to eat doesn’t she?

We were talking about food the other day in class and someone asked if what we talked about would be in my newsletter, so here goes:

Vegetarian restaurants:

Sprig & Vine in New Hope:Nice atmosphere, vegan, BYOB.

Blue Sage Vegetarian Grille in Southampton:Small, popular place.  Reservations are a must.  BYOB.

NellieRae’s Kitchen in Ottsville:A vegetarian café.  Only open for breakfast and lunch.I haven’t tried this place yet, but everyone says it’s good 

Italian Pizza Places:

Spuntino Wood Fired Pizzeria: Doylestown,  in the mall across from the Gap.Pizza in 90 seconds.  Individual sized pizzas only, gourmet toppings, sourdough crust.  Amazing!

Bacco Bistro in Doylestown:Extensive Italian menu.  One favorite pizza is the Drunken Brooklyn – vodka sauce and mozzarella.A friend of mine always uses these folks to cater his events.

Goombas in Colmar:
A Philly style joint.  You can’t eat there, it’s just take out.  14”, 18” and 30” pies.  Good homemade sauce.  The best sandwiches – but they are large.  My family likes the Porcetta alla Rabe – roast pork, aged provolone and broccoli rabe.  I like the Grilled Veggie - Grilled broccoli rabe, eggplant, onions, roasted peppers, mushrooms, sun-dried tomatoes, artichoke hearts, with aged provolone.And, of course, (although it’s not Italian) 

Jule’s Thin Crust in Doylestown:A great selection of different types of toppings.  Great for a slice or to take a whole pie home.

Japanese:

Ooka in Doylestown, of course!All-time favorite Japanese restaurant.  I'm not into the Hibachi tables.

Hachi in Chalfont:It's in the Giant Shopping center on 202.  It's a little further for us and its small, so I always make a reservation.  Because it's BYOB it's less expensive.

My Current Favorite Restaurant:

Maize in Perkasie:Small cozy place in Perkasie.  Great food, cooked to order.  It's slow; be prepared to be there for a while. Bring a good friend, your favorite beverage and enjoy! Want to add?

What does your split look like?

I had never liked working on splits. I knew that somehow, there was something wrong with my posture that I needed to fix before it really made any sense to work on it. For several years I had developed a flat lumbar spine. It felt like my spine was curved the wrong way and that made it impossible to extend one leg backward and one leg forward into a split. I could do symmetrical poses more easily, but asymmetrical poses just felt like something was wrong.

Here is me last year at the end of the MS City to Shore Bike Ride. It felt so good to hop into the Ocean after riding 75 miles, but I really didn’t want a picture of me looking like this. I hated my posture.

Here is me last year at the end of the MS City to Shore Bike Ride. It felt so good to hop into the Ocean after riding 75 miles, but I really didn’t want a picture of me looking like this. I hated my posture.

There is this concept of internal rotation of the legs when you are doing almost any yoga posture. It’s not that the legs are actually internally rotated; it’s just that our tendency is to externally rotate them so we internally rotate them to bring them into neutral alignment. It is much harder to maintain this alignment in back bending postures like Cobra, Up Dog, Bridge, Wheel, etc. especially because the back leg is out of sight and out of mind.

Cobra with the legs externally rotated. Notice the “Butt Fist” Too much engagement of the Gluteus Maximus turns the legs out. This creates compression in the sacrum and low back.

Cobra with the legs externally rotated. Notice the “Butt Fist” Too much engagement of the Gluteus Maximus turns the legs out. This creates compression in the sacrum and low back.

Cobra with refined engagement of the Glutes. Notice there is no clenching of the buttocks and the legs are in neutral and they are parallel to each other. This creates a broadening of the sacrum and low back.

Cobra with refined engagement of the Glutes. Notice there is no clenching of the buttocks and the legs are in neutral and they are parallel to each other. This creates a broadening of the sacrum and low back.

I always have appreciated a teacher who would adjust, assist and correct me in my postures. I could tell that I was doing something wrong, but I couldn’t figure out what it was. Through the persistent feedback of my teachers and my dedication to working on it, I was able to change my posture and then the poses began to click.

Once I made it a priority to work on the neutral alignment of my legs, my posture actually changed. I developed a concave low back. This is one of the promises of a dedicated yoga practice. It took a long time and it was sometimes painful. When you change your posture, it is a little like orthodontics; the change happens gradually over a period of years. Not only do you change the way the bones line up but you change the muscles and nerves as well. The nerve stretching was the most challenging as it produced sensations of numbness and tingling. Fortunately, I worked with a very calm and reassuring physical therapist who promised me that this was all good.

I first started noticing my posture would change after swimming. Here is me before I swam. Notice my flat lumbar area.

I first started noticing my posture would change after swimming. Here is me before I swam. Notice my flat lumbar area.

This is me right after swimming. Notice my lumbar curve. I was astonished by this and wanted to learn how to maintain this posture. I felt so much better standing this way. But initially, it was painful.

This is me right after swimming. Notice my lumbar curve. I was astonished by this and wanted to learn how to maintain this posture. I felt so much better standing this way. But initially, it was painful.

Once my back shifted, my body began to “understand” postures like a split. But, more importantly, it changed my Tadasana, or neutral standing posture. It used to be painful to stand and I was very self conscious of my posture. It also changed poses like Crescent Warrior, Warrior I and Anjaneyasana. These poses are all precursors, or benchmarks to being able to do a split.  It’s funny, I was looking for “before” pictures of me in Warrior I and I couldn’t find any. I really didn’t want any pictures taken of me then. But, now I wish I had them for comparison.  I never could bend my front leg 90 degrees or straighten my back leg before.

Virabhadrasana-1-638-x-425.jpg

Hanumanasana or Split.

The feature pose this month is Hanumanasana, or a yoga split. The pose is named after Hanuman, a monkey god from the Hindu epic, the Ramayana.  We will be discussing Hanuman’s story as we work on our splits.  Hanuman is a devotee of Prince Rama whose wife, Sita is abducted by the demon king Ravana. Hanuman makes an enormous leap across the Indian Ocean, from the Southeastern tip of India to Sri Lanka, in order to rescue Sita from Ravana. His devotional leap is memorialized in this yoga posture.

hanuman.jpg

Hanuman

It seems that yogis are divided into 2 groups over this pose, those who can do the pose and those who can’t. The first group generally likes it. Not so with the second group. Groans will be heard from those who don’t like it whenever this pose is being practiced in class. Notice I said practiced and not performed. One of the keys to any pose is practicing it, not coveting it and not avoiding it. Hanuman didn’t care how he looked as he stretched his legs to Lanka to rescue Sita. And since he did rescue Sita does it matter whether he took one leap or several?

This first week, in Hanumanasana let’s just take a good look at where we are in the pose. It doesn’t matter if all your split is a runner’s stretch (back knee on the floor and the front leg straight). In fact, you will still be reaping the benefits of the pose as long as you work honestly where you are.  Remember, one of the signs of an advanced practitioner is one who knows how to modify his/her pose.

Stages: Working where you are.

Stages: Working where you are.

Stages: almost there

Stages: almost there

According to “Light On Yoga” this pose: …helps to cure sciatica and other defects of the legs. It tones the leg muscles, keeps the legs in condition and if practiced regularly is recommended for runners and sprinters. It relaxes and strengthens the abductor muscles of the thighs.”  Let’s practice this pose together for a month and see what happens.

What Does Your Side Angle Pose Look Like?

The Bhagavad Gita gives us 2 very literal definitions of yoga.  The first one is that yoga is skill in action.  BG 2.50.  And the other is that yoga is equanimity of mind.  BG 2.48.

One of the best ways to learn more about your yoga poses is by either practicing in front of a mirror, or having someone take a picture of you in a pose.  This is often very humbling.  We are often not as advanced as we think we are!  But it is a great way to learn.  Awareness is always the first step in growth.  Remember that yoga is equanimity of mind.

Then compare your pose to an example of a well done posture.  Be wary of some of the poses you find online on Facebook or Instagram.  While you may find some very correctly executed postures, there are many more not so well executed.  I recommend looking in Light on Yoga, or online at www.yogajournal.com.  I often refer to the pictures in Yoga Resource by Darren Rhodes.  Unfortunately it is out of print, so it is very expensive to order.

Since Side Angle Pose is a building block towards Bird of Paradise, let’s look at that. Take a picture of yourself in Side Angle pose from the front and from your head side.  Now compare it to this as an example:

Classic Side Angle Pose

How does your pose measure up?  Can you look at yourself critically but lovingly?   Don’t beat yourself up by how bad your pose might look to you.  Instead, look at what you are doing that is good and work to build on that.  Look at where you need to move to.  Knowing where you are helps you move towards where you want to be.

Sometimes students look at a pose and see certain things that they attach importance to, such as the hand on the floor in Side Angle Pose.  While the hand on the floor is a goal, you have to first look at the skill of that action.

The full version of Side Angle Pose is with the front knee bent 90 degrees, the knee over the ankle and the front thigh is parallel to the floor.  The upper side of the body should be a straight line from the outer edge of the back foot up to the tips of the fingers of the top hand.

But, you also have to look at the pose from the front.  The body should be very 2 dimensional from the front.  That means that the outer buttock of the front leg should be in line with the outer knee.  Not winging out.

In this view, you can see that my buttocks are winging out and my chest is facing slightly downward rather than shining out to the side.  This usually happens when a student prioritizes getting the hand to the floor over the form of the pose.

Parsva-konasana-butt-sticking-out-web-large-1.jpg

In this view, I have the outer buttock of my front leg in line with the outer knee and my chest is facing sideways. This is skillful action

Parsva-Konasana-buttocks-in-line-with-front-knee-web-large-1.jpg

If I didn’t have the flexibility to get my hand to the floor, I would be better off placing my hand on a block and turning my chest open.  This is where the second definition of yoga comes in:  Yoga is equanimity of mind. (BG 2.48)  Can I prioritize skillful action?  Can I find equanimity in backing off from grasping for the full pose until I develop the skill to enter the pose gracefully?

Should the palms be together when the hands are clasped behind the back in Yoga Mudra?

What’s Important?  What’s not Important?

This past weekend I was a guest teacher in anatomy for a Yoga Teacher Training Program.  Sunday’s class was about the shoulders.  We were doing a Standing Forward Bend with the hands clasped behind the back in Yoga Mudra. There were a couple of students who had tight shoulders.  Instead of clasping their hands behind their backs, I asked them to use a belt to get more width between their hands and more stretch in their shoulders.  Some of these students with tight shoulders could not lift their hands off of their sacrums at all.  Instead of stretching their shoulders, they were rounding their backs and caving in their chests.

Some of these teachers-to-be were astonished to see that I suggested that students with tight shoulders take their hands wider apart.  One commented that she thought that the goal was to not only clasp the hands, but to press the palms together.  Now it was my turn to be astonished.  I could see that these teacher trainees were confusing what is important in a pose with what is not.

It is always important to keep the spine in mind and move in the big joints first.  That means that we need to cultivate movement in the hips and shoulders.  If the hips and shoulders don’t move, then the spine is put under a lot of pressure to move.  Each vertebrae in the spine contributes only a few small degrees to the overall movement, but the hips and shoulders are capable of a great range of movement.

In the case of the hands in behind the back in Yoga Mudra, you have to look at the shoulders and upper back.  If the shoulders are wrapped forward and the upper back is rounded, then there is no movement in the shoulders and the person will have trouble clasping their hands behind their back, let alone pressing the palms together.

Uttanasana-with-YM-back-rounded-e1555789370881.jpg

In that case, it would be better for the student to hold a belt between their hands and separate their hands until they can squeeze their shoulder blades together and lift their hands off of their back.  What you look for is the ability to draw the spine into the body instead of it rounding outward.  The idea here is that space creates freedom.  With the hands apart, you create space.

Uttanasana-with-YM-tight-shoulders-using-a-belt-web-large-e1555789387307.jpg

Once the person can start to stretch the front of their shoulders and the spine is no longer rounded, then they can start to work their hands together.

Uttanasana-with-YM-web-large-e1555789401439.jpg