Which pose helps us to grow old gracefully?

A Pose to Help You Age Gracefully

"We sit and walk as we think.  Watch any man as he walks down the avenue, and you can determine his status in life.  With practice, a finer discernment will have him placed socially and economically, and with a fair idea of his outlook on life.  We judge our fellow man more by the arrangement and movement of his skeletal parts than is evident at once."  – Mabel Todd, The Thinking Body.

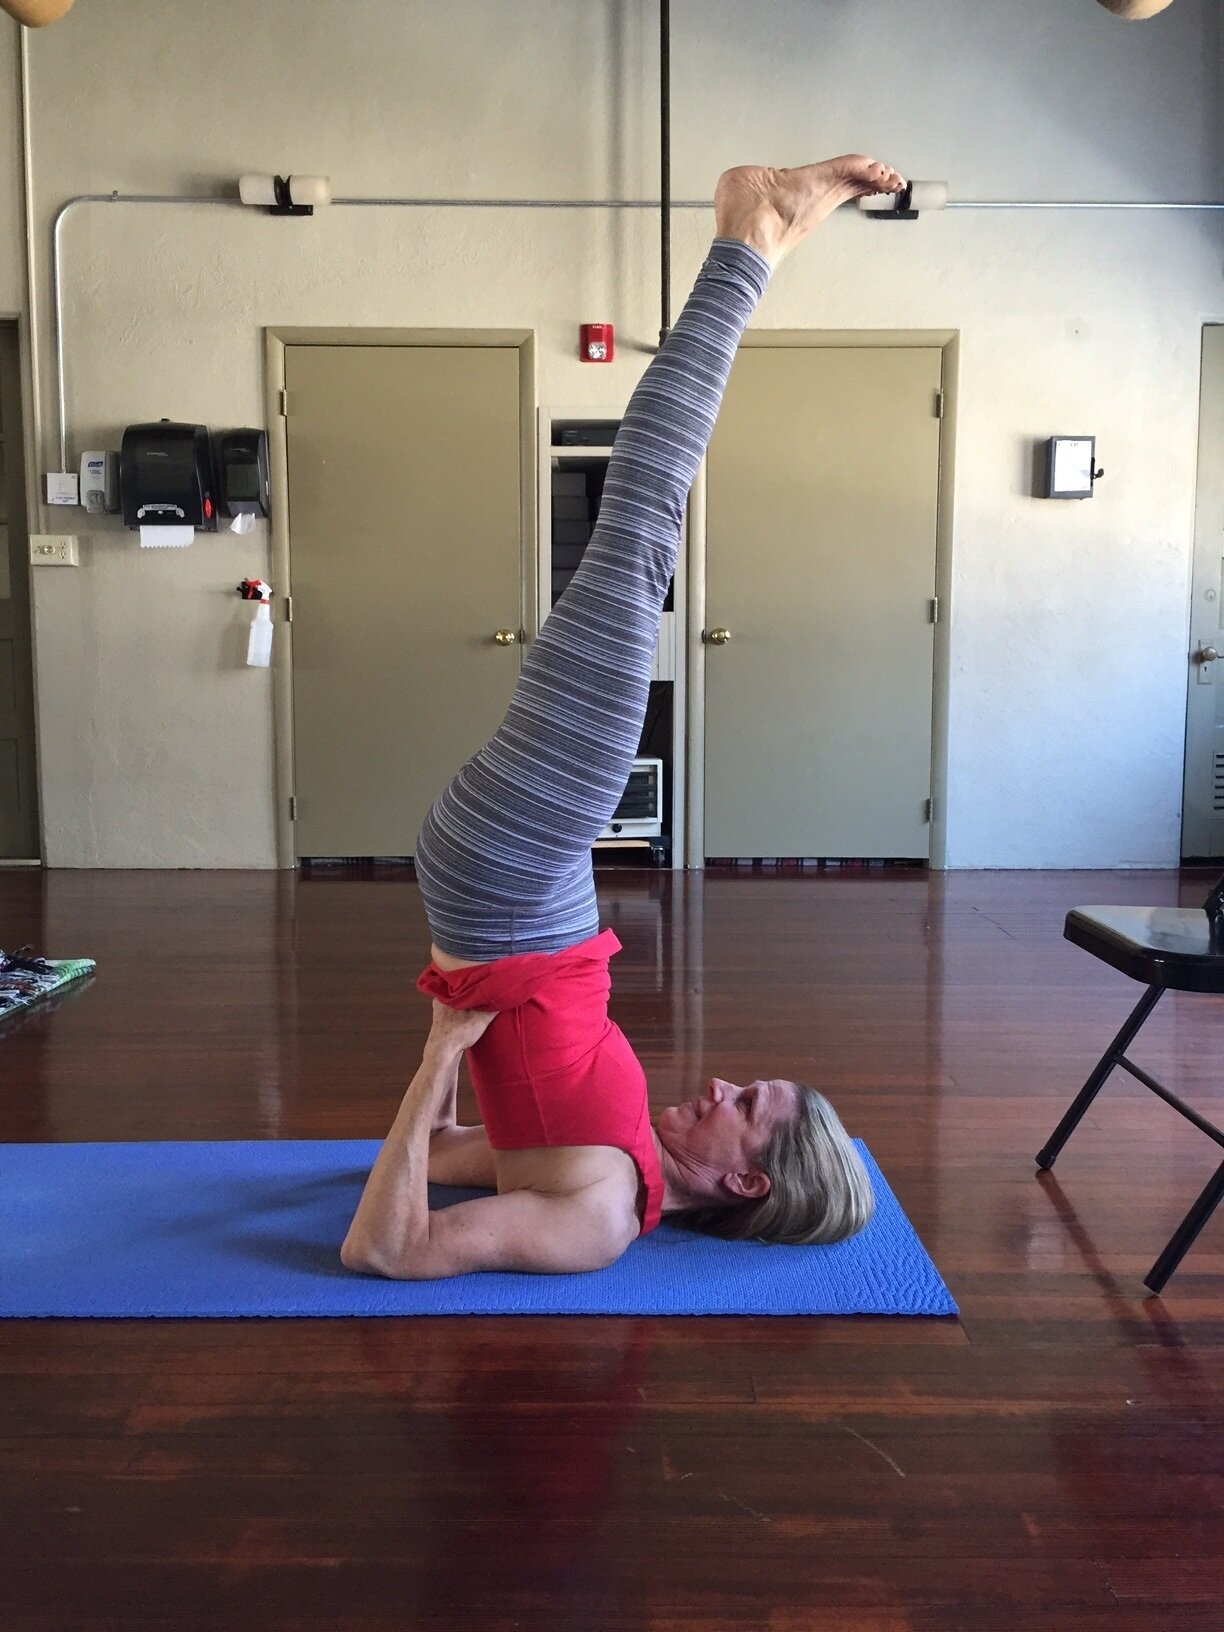
The asanas in general help us to grow old gracefully, but Mr. Iyengar says that it is primarily the action of the spine that shows our age.  To help maintain the gracefulness of our spines we need to stretch and strengthen all of the muscles connecting to the spine.  In Light on Yoga, he says that Paripurna Navasana, or Full Boat Pose, and Ardha Navasana, or Half Boat Pose, bring life and vigor to the back and allows us to grow old gracefully and comfortably.

Let’s look at how to come into the pose:

To come into Full Boat Pose: Start in Dandasana, or Staff Pose.  Place the palms on the floor next to the hips and slightly behind them with the fingers pointing forward.  The back is erect and the chest is lifting.

On an exhale, Lean back so as to raise both legs simultaneously from the floor.  Keep the legs together, straight and with the knees tight.  Balance is maintained on the sitting bones without any part of the spine touching the floor.  In the full pose the legs are raised at an angle of about 60 to 65 degrees which should be higher than the head.

Boat Pose

If you can, lift the hands from the floor and bring the arms parallel to the floor, close to the thighs.  The hands are level with the shoulders and the palms face each other.

Stay in the pose for half a minute with normal breathing.  Gradually increase the time to one minute.  However, you will begin to feel the effects of the exercise after only 20 seconds!

To come into Half Boat Pose:  You start, again, in Dandasana.  But this time, you interlace your fingers behind the back of your head, above the neck.

On an exhale, recline the trunk backwards and simultaneously raise the legs from the floor, keeping the knees tight and the toes pointed.  As in Full Boat, the weight of the body rests on the buttocks and no part of the spine should be allowed to touch the floor.  You will feel the muscles in the abdomen and low back engage.

The legs are maintained at a lower angle of about 30 to 35 degrees and are in line with the head, not above it.

Ardha-Navasana-4-x-6-web-large.jpg

This pose can be held for 20 to 30 seconds.  A stay for one minute indicates strong abdominal muscles.

Make sure you do not hold your breath in either of the Boat Pose variations.  If the breath is held, the effects will be only on the stomach muscles. If the breath is too deep, you will lose the engagement of the abdominal muscles.  The technique is to inhale, exhale and hold briefly breathing only into the upper chest.  Breathing in this way not only tones the abdominal muscles, but it will tone the organs as well.

The effects on the organs of Paripurna Navasana and Ardha Navasana differ due to the position of the legs.  In Full Boat the effect is on the intestines, in Half Boat the liver, gall bladder and spleen are affected.

In the beginning, if the back is too weak to bear the strain of the pose, modifciatons can be used to build strength.  These include keeping the hands on the floor, bending the knees, only raising one leg at a time, or using a belt to hold onto the feet.  When the power to stay in the pose comes, it indicates that the back is gaining strength.  A weak back is a handicap in many ways.  These two variations of Boat Pose coupled with twisting poses will help strengthen the back.

In the section on the effects of Boat and Half Boat, Mr. Iyengar concludes with this observation:  “The importance of having a healthy lower back can be realized if we watch old people when they sit down, get up and walk, for consciously or unconsciously they support their back with their hands.  This indicates that the back is weak and cannot withstand the strain.  As long as it is strong, it needs no support, one feels young though advanced in age.  These two asanas bring life and vigour to the back  and enable us to grow old gracefully and comfortably.”

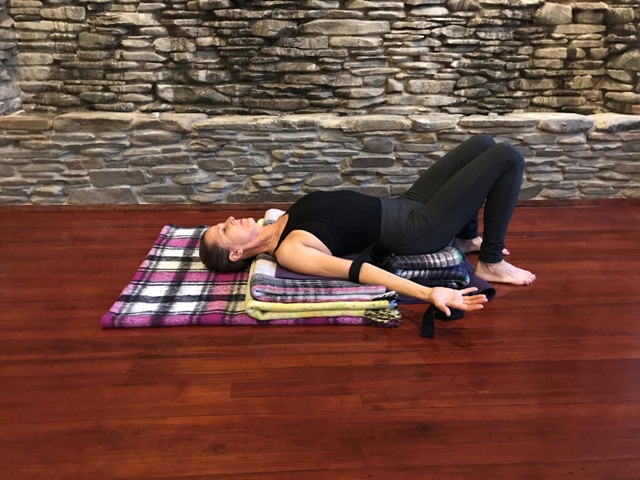
P.S. As I am currently struggling with low back pain, I can testify to feeling old and not so graceful.  This Pose has become too difficult to do.  But rather than skip it, which is the natural tendency, I can work on modifications to help me work towards strengthening my low back and my core.  Often it is the poses we avoid that are the ones that can bring the most balance to our bodies.  The trick is to find a modification that makes it accessible.  Here’s a variation I found that helps with Navasana that can be done sitting in a chair:

Sit on the front edge of a seat with your knees at right angles. Grab onto the sides of the seat with your hands and lean slightly forward. Firm your arms and lift your buttocks slightly off the seat, then raise your heels slightly off the floor (but not the balls of your feet). Let the heads of your thigh bones sink into the pull of gravity and push the top of your sternum forward and up.

Why I don’t consider Legs-Up-the-Wall Pose as a good alternative for Headstand.

Legs-Up-the-Wall: Not an Alternative to Headstand

I don’t recommend Legs-Up-the-Wall Pose as an alternative for Headstand or Handstand. The energy of these poses is very different. Every pose has an energy associated with it. You can look up the effects of each pose in Light on Yoga, or even google it online. But, I recommend that the next time you are in a pose, feel the energy of it. This is mandatory if you are a yoga teacher.

Do Head Stand, if that is in your repertoire (please do appropriate warms ups before just popping up into Sirsasana!) and, after a brief rest in Child’s Pose, do Legs-Up-the-Wall Pose. Compare and contrast the two poses. How similar are they? How different?

Sirasasana I at the wall

Sirasasana I at the wall

Legs-up-the-wall-pose

Legs-up-the-wall-pose

Head Stand is a fiery, invigorating pose that requires strength, stamina and focus. Legs-Up-the-Wall Pose is quieting, cooling and nurturing. The only thing they have in common is that the feet are above the head and heart.

I know a lot of teachers will recommend Legs-Up-the-Wall as an alternative for Headstand or even Handstand, but I would not suggest that. Read my blog post here for alternative postures for Headstand.

Legs-Up-the-Wall Pose is a better modification for Shoulder Stand Stand because Shoulder Stand is also quieting, cooling and nurturing. After practicing Head Stand you are still in the frame of mind to do poses that are more active. After practicing Legs-Up-the-Wall Pose, you are probably ready for Savasana. Try these two poses: do Shoulder Stand and then come down and rest and then do Legs up the Wall. See how they are energetically more alike?

 
Shoulder Stand is a quieting and nurturing pose

Shoulder Stand is a quieting and nurturing pose

So is Legs Up the Wall Pose

So is Legs Up the Wall Pose

As a teacher, it is important to make sure to guide all students through the same energy levels during a class. Your choreography and sequencing should raise the energy towards an apex at the middle of a class and then gradually decline towards quiet as you move into Savasana. Having the energy yo-yo back and forth can be irritating to the nervous system. As a student, it is important to pay attention to what modifications you are being guided towards so that you are still working at the same energy level as the rest of the class.

If Legs-Up-the-Wall Pose isn’t a good alternative for Head Stand, then what is? I recommend lying Supine over cross-bolsters (or a bolster with a block crosswise underneath)*. In this pose, the back of the head and the back of the heels are on the floor. Make sure the back of the neck is long and not contracted. The thighs are belted to keep the legs together. The arms are hand-to-elbow overhead with the forearms resting on the floor.

Cross bolsters, or in this case, bolster over a block*. This is a good alternative to Head Stand, especially for people who do not want to invert.

Cross bolsters, or in this case, bolster over a block*. This is a good alternative to Head Stand, especially for people who do not want to invert.

Some of my students immediately question this modification as it is a supine pose. But, again, you have to try it and feel the energy of it. Because it is a back bend, it is more energizing than Legs-Up-the-Wall Pose which falls into the forward bend category because of flexion at the hips. There is also the work of keeping the legs together which is similar to the work you feel keeping the legs together in Sirsasana. And, with the back of the head resting on the floor, it has the same grounding effect as Head Stand. Two students, one doing Sirsasana and one doing this cross-bolster pose will feel more similar afterwards than if one of them was doing Legs-Up-the-Wall Pose. Try it for yourself and see.

Also, please note, if you have your period, you should not be inverting and Cross-Bolsters Pose is a perfect alternative.


(*I sometimes have to be creative with props. If a studio does not have enough bolsters for everyone to have 2, then I will use a block and a bolster. Also, sometimes 2 bolsters are too high for a student. Whenever you are feeling compression in the low back during a back bend, one of the things you can do is to reduce the height of the props. I often use a skinny bolster crossed over a thin folded blanket for those who complain that their back is feeling pinched in this pose.)

Maybe next week, I will address the pose of Legs-Up-the-Wall Pose. There is an important consideration of the orientation of the pelvis in this pose that I often see misunderstood. And, eventhough Shoulder Stand was the pose of the month last month, I can see that I still need to address the modifications for Shoulder Stand: Legs-Up-the-Wall Pose and Supported Setu Bandha (or Supported Bridge Pose).

If you have any questions or comments, please feel free to respond in the comment section below. I use the questions for future blog posts.

Also, if you enjoy learning more stuff like this, consider enrolling in my Teacher Training Program. The next one begins in September 2019. Not everyone who enrolls in the program wants to go on to teach. Some students take it for their own personal development. You can always take just the 4 weekends of Foundations where we learn about the postures, or you can take the 4 weekends of Anatomy. However, I personally feel that the best way to learn something is to learn how to teach it. In that case, The Art & Craft of Teaching portion of the program is a must! See me for more details.

Why so many blankets for Shoulder Stand? 

Why so many blankets for Shoulder Stand? 

My student teachers often ask why Shoulder Stand isn’t taught more frequently.  The answer is probably because it requires a lot of time and effort to do it correctly.  Salamba Sarvangasana is a challenging pose to teach to safely.  The teacher needs to understand the proper body mechanics and range of motion of the neck and then needs to teach the proper folding and use of blankets and belts to do the pose.  There is also a level of studentship, called adikara in Sanskrit, where the student has to take responsibility for following directions and using the props.  Some students don't want to take the time to get all of the props and use them correctly; they just want to do the pose.

However, the normal range of motion for the neck is only 45 degrees.  If you were to do Shoulder Stand without blankets, it would require the neck to bend 90 degrees, double what it can normally do.  This would put a lot of strain on the last cervical vertebrae and the first thoracic to get those extra degrees of flexion.  This is not good for the discs in the  neck.  We use blankets in Shoulder Stand to make up the difference for the degree of available neck flexion and trying to get the body to be vertical in an upside-down version of Tadasana.  That way the neck is supported in its normal range of motion.


Here is a picture of me standing in an upright version of Shoulder Stand.  As you can see, my neck is bent to its maximum range of motion and it is nowhere near 90 degrees to my torso.  Notice my hands are on my back with my elbows as high as my shoulders.

"Upside Down" Shoulder Stand

"Upside Down" Shoulder Stand

If you turned me upside down, as I would be in regular Shoulder Stand, you would have to make up the difference between the tops of my arms and the back of my head.  This is where the blankets come in.  They raise the floor under my arms so that my neck is not over-flexed.

The black line represents the floor. The two arrows represent the difference in height between the floor and my upper arms. The discrepancy between the height of the elbow and the shoulder gets equaled out under the weight of the body.

The black line represents the floor. The two arrows represent the difference in height between the floor and my upper arms. The discrepancy between the height of the elbow and the shoulder gets equaled out under the weight of the body.

The blankets have to be folded precisely so that the height of the blanket is consistent from my shoulders to the tips of my elbows.  This gives me a firm platform to balance on.  The other thing is that my upper arms need to be on the sticky mat with no fabric between my skin and the mat.  Fabric tends to be slippery and the skin slides on it.  This would cause the elbows to wing out and then the pose would collapse onto your upper back.  Also, if you raise the arms up with the blankets, you need to raise the floor so that the buttocks are at least the same height as the blankets.  That makes it easier to go up and come down.

Blanket set up for Shoulder Stand

Blanket set up for Shoulder Stand

Here is what Shoulder Stand would look like if you did not use blankets.  Since you cannot safely bend your neck 90 degrees, your torso would be angled backwards and your legs would be counter balanced forward. This causes your posture to be "piked".

Notice the tension in my neck to get my torso to bend 90 degrees without blankets.

Notice the tension in my neck to get my torso to bend 90 degrees without blankets.

Now, if your shoulders are tight, you also need a belt.  How can you tell if your shoulders are tight?  Stand in front of a mirror and place your hands on your back as if you were in Shoulder Stand.  There are two things to look for:

First, if you place your hands on your back as if you were doing shoulder Stand, can you draw your elbows towards each other in adduction behind your back to make your elbows invisible to yourself looking in the mirror?  If not, you definitely need to belt your elbows in Shoulder Stand to keep them from winging out and to keep your pose from collapsing onto your neck and upper back.

Elbows winging out. This is why you need a belt!

Elbows winging out. This is why you need a belt!

Elbows hugging in. Even though I can get my elbows to hug in, I still use a belt. My body weight makes it harder to keep my elbows hugging in and over time, as I get fatigued holding the pose, my elbows will start to slide apart. A belt helps preven…

Elbows hugging in. Even though I can get my elbows to hug in, I still use a belt. My body weight makes it harder to keep my elbows hugging in and over time, as I get fatigued holding the pose, my elbows will start to slide apart. A belt helps prevent that.

Second, if you look at yourself from the side, with your elbows squeezing in toward the midline, can you get your elbows as high as your shoulders without rounding your shoulders forward or bending forward; stay in Tadasna.  If you cannot, your shoulders are tight in extension.  See the picture titled "Upside Down" Shoulder Stand above.

There are 2 ways to go up into Shoulder Stand and put a belt on your arms:  One is to go over into Plough and put a belt on your biceps at your elbow creases and the other is to go up the wall and lift your hips as if to do Bridge and then put the belt on your arms.  Once the belt is on your arms, then you lift yourself all the way up into Sarvangasana.  When you come down, just reverse the action.  Take the belt off at the same point you put it on.  Please don’t come down and lay on your arms with your elbows belted.

Getting ready to go up into Shoulder Stand. Notice my head is on the lower blanket. My neck can "feel" the edge of the two stacked blankets and my shoulders are on the sticky mat, which is about 3 or so inches back from the edge. This is so that whe…

Getting ready to go up into Shoulder Stand. Notice my head is on the lower blanket. My neck can "feel" the edge of the two stacked blankets and my shoulders are on the sticky mat, which is about 3 or so inches back from the edge. This is so that when I roll up into Shoulder Stand, my shoulders do not roll off of the blanket stack compressing my neck. I have the belt looped (and measured to my shoulder width) over one arm. This way I can find it and put it on the other arm once I am in Plow.

Going into Plow and putting a belt on both arms. Notice that my hips are directly over my shoulders and my back is as straight as it would be in Tadasana.

Going into Plow and putting a belt on both arms. Notice that my hips are directly over my shoulders and my back is as straight as it would be in Tadasana.


Shoulder Stand, full Pose. Notice how vertical my body is. The blankets under my shoulders help me to achieve that. Also, notice how wide the blankets are. Everything from my shoulders to my elbow must be supported at the same height. My neck and he…

Shoulder Stand, full Pose. Notice how vertical my body is. The blankets under my shoulders help me to achieve that. Also, notice how wide the blankets are. Everything from my shoulders to my elbow must be supported at the same height. My neck and head should be on blanket so they can slide and adjust. My elbows should be on mat so that they cannot slide apart. Plus the belt helps me with that, too.


Lastly, when you come down, please do not let your head whiplash forward.  Use your abdominals to control the descent of your hips and keep the back of your head down on the floor.  Make sure you have something under your hips so that they don't drop below the level of the blankets.  That is what causes your head to pop up off the floor.

When you come down, come through Plow and take your belt off.  Then unroll and stay there for a few minutes.  I like to slide back so that my head, shoulders and arms are on the level of the floor and my lower back and hips are on the blanket/mat stack.  You can bring your feet together into Cobbler's Pose.  (I'll update this post with a picture of that, soon!) Stay here for at least 5 minutes, or finish in Savasana if you choose.

Questions?  If any of this is not clear, feel free to leave a comment below.  Also, if I need any other pictures to demonstrate any of these principles better, please let me know.

Mantra of the Month for February - Guru Mantra

Guru Mantra

Guru Brahma Guru Vishnu Guru Devo Maheshwaraha
Guru Saakshaat Para Brahma Tasmai Sri Gurave Namaha

Guru is the Creator (Brahma), Guru is the Preserver(Vishnu), Guru Deva is Destroyer(Maheshwara). Guru is the absolute (singular) Lord himself, Salutations to that Sri Guru

Translation word by word:

  • Guru: Dispeller of Darkness; Gu=Darkness, Ru=Remover

  • Brahma: Creator; Personification of Creating Quality of God

  • Vishnu: Preserver; Personification of Preserving quality of God

  • Deva: God

  • Maheshwara: Destroyer; Personification of Destroying Quality of God

  • Saakshaat: Self/ Himself

  • ParaBrahma: He who is the highest Lord; Consciousness

  • Tasmai: To him/ To such

  • Sri: Holy, splendorous

  • Namaha: Salutations

Here is my favorite rendition of this mantra being chanted by Bhagavan Das.

Pose of the Month - Head Stand

It is important to be somewhat proficient in some basic yoga poses before attempting to learn Head Stand. These poses should include:

• Triangle
• Side Angle
• Warrior I, II & III
• Down Dog
• Wide Leg Forward Bend
• Pyramid
• Half Moon
• Tree
• Boat
• Cow Face
• Bridge
• Shoulder Stand

In addition, there is a fair amount of core strength. Can you hold Boat Pose, Plank, Side Plank and Reverse Plank for 30 seconds to a minute in each one? Being able to do these poses is no guarantee that you can do Head Stand, but they will help you find and keep your core engaged while you are upside down. It is important to hold the body firmly and to be able to maintain vertical extension even while standing on your head.

Preparation

Before you think about doing Head Stand, you should prepare your body for an inversion by doing poses that get your head lower than your heart. This is to make sure that there is not a sudden and dramatic change in your blood pressure. Here is a simple sequence to do this: Child’s Pose, Down Dog, Standing Forward Bend and then Head Stand, unless you need some shoulder stretches in addition. Cow Face Pose is a great pose to open the shoulders in preparation for Head Stand, even if you only do the arms.

Space

Make sure you have a wall that you can kick up against. And if you are newer and feeling a little precarious, a corner in a room is a very secure way for new students to experience this pose.

Mat

It’s nice to have a cushion for your head when you do headstand. I usually take a thin mat and fold it in half and then in half again. This is about the right size for your arms and head in this pose. If your mat is too thick, you can use it flat or maybe just in half. You want padding, but you do not want your surface to be too squishy as this makes it harder to balance. Also, if you have long sleeves, roll them up.  You want to make sure that your elbows don't slide out while you are in the pose; skin to sticky mat is best.

The foundation in any yoga pose is that part that touches the floor.

The Head

Knowing what part of the head is on the floor is important for the integrity of our neck in particular and your spine in general. The spot is right at the top of the crown of your head. It’s right where you would try to balance a book. A way to find it is to place the heel of your hand at the bridge of your nose, keep it there and stretch your fingers up and over the top of your head. Right where the tip of your middle finger touches your head, that’s the spot.

Screen-Shot-2019-02-25-at-11.57.07-AM-300x300.png

Arms

From a kneeling position, place your forearms on the floor so that your elbows are directly under your shoulders. There are ways to measure this, but it is important to learn to look, see and feel it for yourself. Stretch the forearms forward and clasp the hands, interlacing the fingers. Remember to keep your elbows under your shoulders and don’t let them wing out. This will cause you to put too much strain on your neck. Sometimes it may be necessary to belt the elbow if they keep winging out. Make sure that you alternate which way the fingers are interlaced each time you do Head Stand.

The part of your forearms that should be on the floor are the long bones that go from your elbows to the pinky finger sides of the wrist. The wrist bones should be stacked vertically. Look to see that the bump on your wrist at the thumb side of your hand is directly above the bump that is on the pinky finger side of the hand. Most students squeeze their hands so tightly together that the fingers turn white. Try to keep your hands relaxed. Instead of gripping the fingers, try to press down evenly along the entire length of your forearms from the elbow tip to the wrist. This will help you balance and take pressure off of your neck by putting it into your arms.

Stages

The first stage is called Dolphin. This is “Head Stand” with your forearms and head on the ground as if you were going into the full pose; your hips are in the air but your feet stay on the ground. Keep walking your feet in close to your head as you press your forearms into the ground. As you walk your feet in keep lifting your hips higher and higher. This can be done in the middle of the room.

The second stage can be done against a wall. Be close enough to the wall that your knuckles are touching the wall. If you are feeling particularly insecure about this, find a corner to practice in. Do everything from the previous stage, but keep walking your feet in toward your face. Keep the hips lifting until you feel your feet start to get lighter and lighter. Try to push with your feet until you can bend your knees and draw them into your chest and allow your feet to come off of the floor. Imagine you are trying to balance on your head in “Child’s Pose”. This requires core strength to hold you up.

After learning to balance in the previous version, you can start taking one leg up at a time. Once you get used to being upside down, be aware of what you are doing with your legs. Practice all of the same actions you do in Tadasana: Hug your legs toward the midline; roll the thighs in, back and apart; Sit bones reaching towards the heels, pubic bone lifting towards the head; inner ankles together, heels slightly apart; knees lifted, feet “flointed” (feet pointed, toes flexed back).

Once you become comfortable in Head Stand at the wall, then you can begin to move away from the wall. The first stage is one knee length away from the wall. This way you are far enough away from the wall to try to balance, but close enough so that you can bend a knee and touch the wall safely with your foot.

If you can balance a knee length away from the wall, the next step is in the middle of the room. Unfortunately, it starts to get unsafe to simply keep inching away from the wall. If you are farther than your knee length and you start to go over backwards, you can crash your knees into the wall and hurt yourself. Not fun!

The first couple of times you practice in the middle of the room, if you don’t have a spotter, just try coming up into the Child’s Pose variation. Again, this is a great core strengthening position! Once you feel confident you can try reaching one leg up at a time.

Everybody falls out of Head Stand occasionally. It is helpful to have a contingency plan if this happens. It can be scary but it’s often not as bad as you feared. If your feet fall towards your face, this is not falling out. It’s when your feet go over backwards. If you have the presence of mind, tuck your chin, release your interlaced fingers and just try to roll out of it. (Again, if you are too close to a wall, this could be painful.) Tucking your chin will keep you from falling flat on your back. Often it is the sensation of your interlaced fingers getting squeezed hard that is the most painful thing about falling out of Head Stand. Some people try to minimize the damage of falling out of Head Stand by practicing on a carpet. But, just like having a too thick mat, the squishier the foundation is, the harder it is to balance.

Remember to rest in Child’s Pose for a period of time proportional to the amount of time you spent in Head Stand before coming up. Head Stand should usually be counter posed by Shoulder Stand although it doesn’t have to immediately follow Head Stand, it just needs to be done before that practice session is over.

Interesting Questions

In class, we have been working on opening the shoulders in preparation for Shoulder Stand.   One of the postures we have been doing is clasping the hands behind the back and lifting them up while keeping the heads of the arm bones back and the thoracic spine moving deeply into the body.

One of the questions that came up was  whether you should work on getting the heels of the hands together in this position.  The answer is that “it depends”. (My favorite response!) This question also tells me what my students are considering the important part of the pose.  Remember that we always want to move from the big joints first; the hips and shoulders.  If we don’t, then we place too much leverage and pressure on the spine.  In this example, it’s not what the hands are doing that is important.  It’s what the shoulders are doing.

Take a look at these two photos of me with my hands clasped behind my back:

Pascima-yoga-mudra-shoulders-hunched.jpg

In the first one, the heads of my arm bones are wrapping forward, my chest is sunken in and my upper back is hunched.

Pascima-yoga-mudra-shoulders-back-4-x-6.jpg

In the second one, the heads of my arm bones are staying back, my thoracic spine is moving into my body opening my chest.

In this pose, the important action is that of opening the chest and stretching the Anterior Deltoid, the front of the shoulder, Pectoralis Minor, the front of the chest, and the Biceps.  It is much better for the student with tightness or restriction in the shoulders to take the hands further apart by maybe holding onto a belt so that they can get the chest open and the heads of the arm bones back.  Only after that is achieved can the student begin to work their hands closer and closer together until the palms finally touch.

This is Purna, That is Purna.

ॐ पूर्णमदः पूर्णमिदं पूर्णात्पुर्णमुदच्यते
पूर्णस्य पूर्णमादाय पूर्णमेवावशिष्यते ॥
ॐ शान्तिः शान्तिः शान्तिः ॥

Om poornamadah poornamidam Poornaat poornamudachyate Poornasya poornamaadaya Poornamevaa vashishyate.
Om Shaantih Shaantih Shaantih

(Listen to the Ravi Shankar version here.)

Meaning:
Om, That (Outer World) is Purna (Full with Divine Consciousness); This (Inner World) is also Purna (Full with Divine Consciousness); From Purna comes Purna (From the Fullness of Divine Consciousness the World is manifested) ,
Taking Purna from Purna, Purna Indeed Remains (Because Divine Consciousness is Non-Dual and Infinite).
Om Peace, Peace, Peace.

We are made from Divine Consciousness. We are made from the same stuff as the stars and planets. In yogic tantric literature, the Divine so wanted to experience itself in every possible incarnation that it manifested as you and me and everything else in our material world. This descent of how the “One” becomes the many is described as the 36 Tattvas. These describe the principles of existence and of consciousness becomes matter. Basically, it describes how we came to be.

It is one thing to learn about us all “being one”. It is quite another thing to experience it. We all have moments in our lives where we feel that we are connected; that we have the insight into a deeper part of ourselves and we perceive that oneness. More often, though, we feel separate and different. This experience of differentiation comes from a power called Maya, or illusion. Maya has three ways in which it operates; the three Malas. They are:

1. Anava Mala
Creating feelings of unworthiness, the source of incompleteness we experience. It gives rise to feelings of insecurity and sadness. Connected to the heart.

2. Mayiya Mala
Perception of difference, separateness between us and the world. Creates comparison to others. It gives rise to feelings of jealousy and anger. Connected to the mind.

3. Karma Mala
The capacity for limited activity, the feeling of inability to act, not doing enough. It gives rise to feelings of worry and fear. Connected to the body.

These Malas are part of our existence, part of the fabric of who we are. As such, there is no need to get upset about it or even trying to “rid” ourselves from these perceptions. Yoga can teach us to become observant when these Malas come up. We cultivate the power of discernment to help us see that even though we feel a certain way, it is not who we are. With this increased awareness, we work with the Malas and not against them and we will be able to see ourselves as we truly are: Pure Consciousness.

This mantra is meant to help us connect to that sense of “Oneness”.

Here is another beautiful recording of the mantra for your listening pleasure!


This reading from Louise Hay seems to go perfectly with this mantra:

In the infinity of life where I am, all is perfect,
whole and complete and yet life is ever changing.
 There is no beginning and no end,
only a constant cycling and recycling
of substance and experiences.
Life is never stuck or static or stale,
for each moment is  ever new and fresh.
I am one with the very Power that created me and this Power
has given me the power to create my own circumstances.
I rejoice in the knowledge that I have the power
of my own mind to use in any way I choose.
Every moment of life is a new beginning point
as we move from the old.  This moment is a new point
of beginning for me right here and right now.
All is well with my world.

from You can Heal Your Life by Louise L. Hay.  You can download a pdf version of the book here.

Chanting AUM

AUM: The Best Praise or Prayer

The Latin word Omne and the Sanskrit word Aum are both derived from the same root meaning all and both words convey the concept of omniscience, omnipresence and omnipotence. Another word for Aum is pranava , which is derived from the root nu meaning to praise, to which is added the prefix pra, denoting superiority. The word, therefore, means the best praise or the best prayer.

The symbol Aum is comprised of three syllables, namely the letters A, U, M and when written has a crescent and dot on its top. A few instances of the various interpretations given to it may be mentioned here to convey its meaning.

The letter A represents the deepest sound in the body that can be made. It is a sound that comes from the throat. The U represents the sound in the middle of the palate. The M represents the sound at the furthest extent that the human voice can create, at the end of the lips. Thus A, U, M represents the sounds of creation represented by the power of speech. As it says in Genesis: In the beginning was the Word and the Word was God. Aum represents the power to create through speech.

The letter A symbolizes the conscious or waking state, the letter U the dream state, and the letter M the dreamless sleep state of the mind and spirit. The entire symbol, together with the crescent and the dot, stands for the fourth state, which combines all of these states and transcends them. This is the state of Samadhi (a state in which the aspirant is one with the object of his meditation, the Supreme Spirit pervading the universe, where there is a feeling of unutterable joy and peace).

The letters A, U, M symbolize respectively speech, the mind and the breath of life, while the entire symbol stands for the living spirit, which is but a portion of the divine spirit.

The three letters also represent the dimensions of length, breadth and depth, while the entire symbol represents Divinity, which is beyond the limitation of shape and form.

The three letters A, U and M, symbolize the absence of desire, fear and anger, while the whole symbol stands for the perfect man, one whose wisdom is perfectly established in the divine.

They represent the three genders, masculine, feminine and neuter, while the entire symbol represents all creation together with the Creator.
They stand for the three gunas or qualities of sattva, rajas and tamas, while the whole symbol represents a gunatita, one who has transcended and gone beyond the pull of the gunas.

The three letters correspond to the three tenses – past, present and future – while the entire symbol stands for the Creator, who transcends the limitations of time.

They also stand for the teaching imparted by the mother, father and Guru respectively. The entire symbol represents Brahma Vidya, the knowledge of the Self, the teaching of which is imperishable.

The three letters depict the three stages of yoga discipline: asana, pranayama and pratyhara, The entre symbol represents Samadhi the goal for which the three stages are the steps.

They represent the triad of Divinity, namely Brahma the creator, Vishnu the maintainer and Shiva the destroyer of the universe. The whole symbol is said to represent Brahman from which the universe emanates, has its growth and fruition and into which it emerges in the end. It does not grow or change. Many change and pass, but Brahman is the One that remains unchanged.

The letters A, U, M also stand for the mantra “Tat Twam Asi” (That Thou Art), the realization of man’s divinity within himself. The entire symbol stands for this realization, which liberates the human spirit from the confines of his body, mind, intellect and ego.

After realizing the importance of AUM, the yogi focuses his attention on his beloved Deity adding AUM to the name of the Lord. The word Aum being too vast and abstract, he unifies his senses, will, intellect, mind and reason by focusing on the name of the Lord and adding the word AUm with one-pointed devotion and so experiences the feeling and meaning of the mantra.

The yogi recalls the verses of the Mandukopanisad: Taking as a bow the great weapon of the Upanisad, one should put upon it an arrow sharpened by meditation. Stretching it with a though directed to the essence of That, penetrate the Imperishable as the mark, my friend. The mystic symbol AUM is the bow. The arrow is the self. Brahman is the target. By the undistracted man is It penetrated. One should come to be in It, as the arrow in the mark.

Most of this is taken from Light on Yoga by B.K.S. Iyengar

Doing it Right

Doing It RIght

In the book, “How Yoga Works,” Miss Friday is working with her student, the Captain.  The Captain comes to yoga as a lot of us do, to help us get out of pain; in this case back pain. He has been working with his teacher for a little while and he is pleased with the progress he is making.  But, as he practices Miss Friday sees that he is cheating in Pascimottanasana (Seated Forward Bend).  He is feeling a little pride in his practice because he can already touch his head to his knees in this seated forward bend.  But Miss Friday stops him.  He doesn’t understand why she stops him. But she tells him that he is cheating because he is bending his knees and rounding his spine in order to get his head to touch his head to his knees. (a common cheat)  She warns him that his both his back and legs are supposed to be straight.  She describes the correct bio-mechanics of hinging from the hips and not folding at the waist.  She tells him that they are doing the practice to make his back healthy again, not to make sure that he can touch his head to his knees.

Y.S. I.14  Your practice must be done correctly, for then a firm foundation is laid.

Miss Friday tells the Captain: “You see, the point is not what the pose looks like in the end.  It’s the process of the pose as it goes on; it’s what it does inside of you, how it works to begin to straighten and open your channels.   These are the channels of how energy flows in the body.  (More about that in another post!) Miss Friday goes on to say:  “But if you don’t do the pose right, if you cheat, if you try to trick the pose and get around it just so you look good, then the pose doesn’t work on you the way it is supposed to.”

She asks him to do the pose, again, without bending his knees, which he does.  It’s a beautiful pose, his back is straight, his legs are straight and he is hinging at the hips.  But the Captain is unhappy because his head is about 2 feet from his knees!

Pascimottanasana-do-and-dont.png

We are often like the Captain, impatient in our progress and mistaking what it not important for what is important.  Often a student sees someone do a very advanced Pascimottanasana and sees that their head is touching their legs, so they think that is important, but what they don’t see is the straightness of the legs and the long, almost straight line of the back.  It can take a long time to get to that stage of practice with a lot of hard work and true understanding of what is going on in the body.

Pascimottanasana-4-x-6.jpg

One of the things I love about the study of yoga and the stories and mythologies that it uses to teach us is that we are meant to see ourselves in every character of the story.  Can you see yourself as the Captain?  Can you see yourself as Miss Friday?  Sometimes it is hard for us to recognize ourselves as the Captain, especially if we don’t like what we see.  But, we are also meant to see ourselves from a different perspective.  That way we can see if we are cheating ourselves and examine why.  Pride?  Envy?  Impatience?  While Impatience is not one of the Seven Deadly Sins from Christianity, or the Six Enemies of the Heart from the Yoga Sutras, as are pride and envy, it still has a way of blocking the channels and stopping progress on the path.

In the Iyengar style of yoga that I study and teach, the focus is on doing the poses correctly, to open the channels of energy in the body to create an optimum flow of healing energy.  It's a method that has worked for me.

The Trouble Tree

The Trouble Tree - author unknown

The carpenter I hired to help me restore an old farmhouse had just finished a rough first day on the job. A flat tire made him lose an hour of work, his electric saw quit, and now his ancient pickup truck refused to start. While I drove him home, he sat in stony silence.

On arriving, he invited me in to meet his family. As we walked toward the front door, he paused briefly at a small tree, touching the tips of the branches with both hands. When opening the door he underwent an amazing transformation. His tanned face was wreathed in smiles and he hugged his two small children and gave his wife a kiss.

Afterward he walked me to the car. We passed the tree and my curiosity got the better of me. I asked him about what I had seen him do earlier.

"Oh, that's my trouble tree," he replied." I know I can't help having troubles on the job, but one thing's for sure, troubles don't belong in the house with my wife and the children. So I just hang them on the tree every night when I come home. Then in the morning I pick them up again."

He paused. "Funny thing is," he smiled, "when I come out in the morning to pick 'em up, there ain't nearly as many as I remember hanging up the night before."

The story of The Trouble Tree reminds me of a sermon I remember from my childhood. The pastor of a parish in a small town was frustrated with his parishioners always complaining about their problems. He didn’t know how to help them. But, one day he had an idea. He asked everyone to write their problems out on a card and tie them to a tree. After everyone did this, he invited the townspeople to walk around the tree and pick any card off the tree that they wanted to. The idea was that they could trade their problems in for somebody else’s. I remember getting excited about this as a kid. I fantasized about trading in my imperfect world for the world of my dreams. I was dumbstruck when the priest said that after everyone walked around the tree and looked at everyone else’s problems, they realized that their lives were not so bad after all. Everyone had problems. This simple act made people remember to count their blessings and to be more compassionate with their neighbors, where before, they may have been envious of them.
This was a great lesson for a young girl and perhaps the beginnings of my life as seeker. What is your earliest memory of a great lesson you learned that has helped shape your life and who you have become?

Love yourself. Be compassionate with yourself on your journey. And always remember to be grateful that you have a journey to be travelling on.