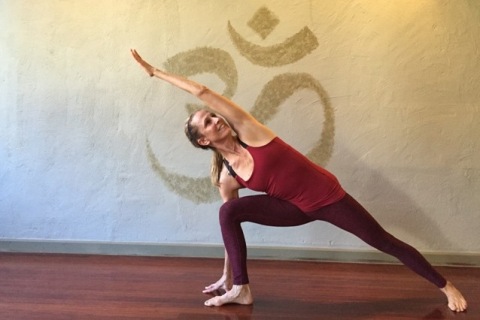
Pose of the Month

Wide Legged Forward Fold to Tripod Headstand (Prasarita Padottanasana to Sirsasana II)

The transition from one pose to another requires the ability to do the two postures individually.  It is also important to understand how the actions of one pose are developed and then get carried on to the next.  There is a progression in learning yoga poses. 

Wide Legged Forward Fold is typically learned beforeinversions because it gets the head lower than the heart preparing the body forinverting.  The placement of the head andhands in Prasarita Padottanasana sets the foundation for Headstand II.  A couple of important points in this standingpose are the straightness of the legs due to the engagement of the quadricepsand the ability to hinge at the hips and elongate the trunk to get the top ofthe head towards the floor. 

The Straightness of the Legs.

This is often a point of confusion for students who havebeen taught to soften their knees in standing poses.  This may be a good cue for gentle yogaclasses where the aim is to breathe and move and where the poses are notbuilding upon each other but are done for their own sake.  But, if you are interested in a progressivepractice that teaches you to do more complex poses, then the basics need to belearned.  In straight leg poses the legsare meant to be straight, which is not locked out and hyper-extended – that isa different problem!  In order tostraighten the legs, the quadriceps muscles need to be engaged which in turndraws the knee caps up into the thigh. You can tell if your quads are engaged if, when you grab your knee capwith your fingers, you cannot wiggle it from side to side.

If you look at my legs in Prasarita Padottanasana,

Wide-Legged-Forward-Fold-4-x-6.jpg

Wide-Legged Forward Fold

in the Wide Legged transition between the Forward Fold and Headstand,

Sirsasana-II-wide-legs-web-large-4-x-6.jpg

and then in Sirsasana II itself,

Sirsasana-II.jpg

there is never a point where my legs are bent, or my knees are “soft”.  This engagement of the legs does two things: it allows me to bend and hinge only at the hip joint and not at the knees and low back, and it keeps my awareness focused on balancing my body parts by knowing where they are and what they are doing in space.  And it allows me to balance!

Try this:  Find abroomstick or a yardstick, dowel or even a baseball bat and place it on yourpalm or the finger tip of one hand and, without gripping it with your fingers,see if you can balance it.  Chances arethat you will be able to, at least for a little while.  Now, imagine that the thing you are balancinghad a joint in the middle that was soft and wiggly.  Would you still be able to balance thestick?  The answer is no, because the toppart would fall in the direction of the bend and you would have no control overit.  Engaging your muscles is exertingcontrol over your body. 

Check out this handstand video clip.  Notice how straight her arms and legs arefrom the forward fold into the handstand. There is only a slight bend in the leg she uses to hop up: https://www.pinterest.com/pin/119908408816084757/

So the first skill we will work on this month is tostraighten and strengthen the legs.  Wewill work on this in Triangle, Pyramid Pose, Warrior III, Half Moon Pose andStanding Hand to Big Toe Pose.

Next week we will work on Tripod Headstand.  Then, before you learn to lift from Wide Legged Forward Fold into Tripod Headstand, you will learn to come down from Tripod Headstand into Wide Legged Forward Fold. First we will do this one leg at a time, without falling out and then with both legs at the same time.  After that, you will be ready to learn to lift up from Prasarita Padottanasana into Sirsasana II. 
Urdhva Dhanurasana

Urdhva means upwardfacing and Dhanurasana means bow.  That would make this pose Upward Facing Bow Pose.  However, it is more commonly called Wheel (even though the Sanskrit word for wheel is Chakra – go figure).  Regardless of what we call this pose, it is a big back bend. 

This version of Wheel looks more like an upside down letter "U".

To prepare for Urdhva Dhanurasana we need to open our shoulders, upper back, front of the hips and front of the thighs.  If these parts of the body aren’t open enough, we might feel pain in our low backs, wrists or neck.  The hips and shoulders are the most moveable parts of the body.  But, if they don't have their optimum range of movement, then the wrists, elbows, neck, knees, ankles and low back can take the strain because they are often asked to move more than they should.

Often students will ask me how they can stretch their wrists because that’s where they feel the most pain when they do Wheel. Often the site of the pain is not the cause of the pain and this is true with the wrists in Wheel.  If you are feeling pain in your wrists during Wheel, or other poses where the hands are part of the foundation, the reason for the pain is most likely because of restricted movement in your shoulders.

This month, we will explore opening your shoulders, and hips as we work on Wheel.  You’ll learn to recognize where you are stuck and where you should spend some time in your home practice to improve your ability to do Urdhva Dhanurasana.

Here are some exercises to do for your yoga homework to improve your Wheel.

Are your shoulders tight? Do your wrists hurt when you do Wheel?

Set up for Wheel with your head and forearms touching the wall.  When you come up into Wheel this way, it gives you a sense of direction. The idea is to move your chest towards the wall. If your chest is far from the wall, then your wrists will be bent at an acute angle. (Your wrists are not meant to be bent at an angle less than 90 degrees!) Have someone take a picture of you in Wheel and see how far your chest is away from the wall. When you look at a picture of yourself in Wheel, you should look more like an upside down "U", and less like an arc of a circle. If your chest is far from the wall and you look more like an arc of a circle, then you need to do some stretches to open up your shoulders.

To improve the flexibility in your shoulders do this stretch everyday:

Cow Face Arms. Extend your right arm straight up to the ceiling. Bend your elbow and pat yourself on your back with your right hand, dropping it down behind you from above. Take your left arm and swing it up behind your back, trying to reach your top hand with your bottom hand. If you cannot connect your fingers together, dangle a belt down from the top hand and grab it with the bottom hand. Do this three times on each side, holding for 10 to 20 seconds each time.

Gomukhasana-with-belt-web-large.jpg

Cow Face Arms with a belt. If your shoulders aren't open enough for Wheel - you will probably need a belt to do this pose.

Are your hips tight? Can you keep your heels on the floor in Wheel?

To improve the flexibility in your hips do this stretcheveryday:

Thigh stretch at the wall.  Slide your left shin up the wall and bring your right foot forward into a lunge position.  Can you get your left knee to the wall with your hips level?  Make sure that your knee is behind your hip and straight down, not in front of your hip and slanting out to the side.  Do this every day, three times each side, holding for 20 to 30 seconds at most on each side. 

Pigeon-thigh-stretch-web-large.jpg

Pigeon Thigh Stretch at the Wall. If this is hard to do and be in good alignment, then your hip flexors are probably hard for you to keep your heels down in Wheel.

It would be nice to take a "before" picture at the beginning of the month and an "after" picture at the end to chart our progress. What do you think? Are you in?

This is not your mother's chair yoga

Visvamitrasana-with-a-chair-4-x-6.jpg

Visvamitrasana with a chair.

Sometimes I've had people walk out of class when I ask them to grab a chair as a prop. But this is not for the kind of chair yoga that most people think of. In the Iyengar style of yoga which I study and practice, a chair is used to help support the body as you open into greater ranges of strength and flexibility. Check out this way of entering into Visvamitrasana using a chair. Elevating the pose off of the ground by using a chair makes the pose that much easier and more accessible. Give it a try and let me know what you think.

Three pre-requisites for Visvamitrasana and one modification.

There are three poses that are essential to be able to do well before you attempt Visvamitrasana.  The first one is Triangle with your hand on the floor, the second one is Side Angle Pose with your hand to the floor and the third is Side Plank.Triangle pose is the first pose that students learn that stretches the hamstrings.  At first it is hard to get the hand to the floor, but over time, as your flexibility improves, it may become possible.  However, don’t sacrifice the opening of the chest to get the hand to the floor.The second pose is Side Angle Pose.  While it is not necessary to be able to do Side Angle Pose with your hand on the floor, in order to do Visvamitrasana it is.The third pose that is important is a good strong Side Plank.  Work on your ability to hold Side Plank for a minute.  Make sure that the chest is open in Side Plank the same way it is in Triangle and Side Angle.If Visvamitrasana seems impossible, there is a “Half” version.   This is where you start from a kneeling position.  You can even place the raised foot on a wall for better stability.Here is a sequence for Visvamitrasana.  I will be using elements of this in class this month.

Reclined Hand to Big Toe Pose, leg straight up and out to the side

Active Supta Padangusthasana or Hand to Big Toes Pose

Seated Side Stretch

Sukhasana-side-stretch-4-x-6.jpg

Triangle

Trikonasana or Triangle Pose

Side Angle

Side Angle

Bound Side Angle Pose

Bound Side Angle Pose

Gate Pose

Parighasana-KEy-4-x-6.jpg

Revolved Seated Tree

Parivrtta-Janu-Sirsasana-KE-4-x-6.jpg

Side Plank

Karin in Vasisthasana

Half Visvamitrasana

Ardha-Visvamitrasana-4-x-6.jpg

Full Visvamitrasana

Visvamitrasana-KEy-4-x-6.jpg

Parivrtta Parsva Konasana

Parivrtta-Parsva-Konasana-full-pose-web-large-640-x-427.jpg

Parivrtta means revolved, turned round or back.
Parsva means side or flank.
Kona is an angle.

This is revolved side angle pose. It is a deep twisting posture that forms the foundation of many other twisting poses such as Parsva Bakasana, Side Crow and Eka Pada Koundinyasana I, a twisting arm balance.  As we play with this pose this month, we will see where it leads us.

Parivrtta Parsva Konasana, is related to Side Angle Pose with a twist.  It is a harder pose than Revolved Triangle Pose because of the position of the bent knee.  The bent knee locks the hips in and makes the twist start down low in the back. In Revolved Triangle Pose, the twist is more evenly spread over the length of the spine. It is for this reason that Revolved Side Angle Pose can be therapeutic for the low back.  But, it is also a caution to allow the spine to twist organically and not to try to force the twist.  We will use Revolved Triangle as a prep to come into Revolved Side Angle Pose.

The nature of twisting poses is that they change energy.  If you are feeling stuck and lethargic, twists can help you get unstuck and energize you.  On the other hand if you’re feeling wound up, twists can release energy and calm you down.

The thing about twists, however, is that when we run into difficulty in this pose we literally run into our self. Our own body gets in our way. How do we sit with the energy of that? What does it bring up for us? Does the judge or critic show up? Do we get mad or frustrated with ourselves? Do we try to use our arms for leverage and try to force ourselves into some external, or preconceived idea about ourselves? This is the interesting, inner work of the pose.

Pay attention to your breath while practicing Parivrtta Parsva Konasana.  We generally use and exhalation to come into a twist and an inhalation to come out of one.  But, notice your breath while you are in the pose.  It will be a little more restricted , but can you still breathe easily?

Hanumanasana or Split.

The feature pose this month is Hanumanasana, or a yoga split. The pose is named after Hanuman, a monkey god from the Hindu epic, the Ramayana.  We will be discussing Hanuman’s story as we work on our splits.  Hanuman is a devotee of Prince Rama whose wife, Sita is abducted by the demon king Ravana. Hanuman makes an enormous leap across the Indian Ocean, from the Southeastern tip of India to Sri Lanka, in order to rescue Sita from Ravana. His devotional leap is memorialized in this yoga posture.

hanuman.jpg

Hanuman

It seems that yogis are divided into 2 groups over this pose, those who can do the pose and those who can’t. The first group generally likes it. Not so with the second group. Groans will be heard from those who don’t like it whenever this pose is being practiced in class. Notice I said practiced and not performed. One of the keys to any pose is practicing it, not coveting it and not avoiding it. Hanuman didn’t care how he looked as he stretched his legs to Lanka to rescue Sita. And since he did rescue Sita does it matter whether he took one leap or several?

This first week, in Hanumanasana let’s just take a good look at where we are in the pose. It doesn’t matter if all your split is a runner’s stretch (back knee on the floor and the front leg straight). In fact, you will still be reaping the benefits of the pose as long as you work honestly where you are.  Remember, one of the signs of an advanced practitioner is one who knows how to modify his/her pose.

Stages: Working where you are.

Stages: Working where you are.

Stages: almost there

Stages: almost there

According to “Light On Yoga” this pose: …helps to cure sciatica and other defects of the legs. It tones the leg muscles, keeps the legs in condition and if practiced regularly is recommended for runners and sprinters. It relaxes and strengthens the abductor muscles of the thighs.”  Let’s practice this pose together for a month and see what happens.

The Pose of the Month for April 2019

Bakasana

Baka means Crane, although we typicallly call it Crow Pose.  Some students think that Crow is with the arms bent and Crane is with the arms straight.  I've only known it as Crow.  In the beginning it is hard to straighten your arms.  (As you can see in my photo.)

Crow is often one of the first arm balances you learn after Caturanga and Handstand.  “Arm Balances are the perfect poses to practice persistence in the face of challenge, as well as non-attachment to the fruits of your labors.” ( Julie Gudmestad, YJ, July/August 2002.)

Alignment – Skeletal:
How is the body lined up in space?

  • The hands are place on the floor shoulder width apart, wrist creases pointing straight ahead.

  •  The knees are pressing against the outer arms, high up near the arm pits.

  • The back is rounded and is higher than the buttocks.

  • The inner edges of the feet are touching.

  • The arms will be bent at first and eventually straightened

Actions – Muscular:
What do you do while you are in the pose?

  • Press the inner knees against the arms.

  • Isometrically squeeze the inner arms towards each other.

  • Press the inner edges of the feet together, everting the feet, this will also help with squeezing the knees.

  • The belly button is pulled back into the spine, engaging the abs.

  • Lift the kidneys towards the ceiling.

  • Extend the neck and keep the head as high as possible.

Drishti, (or Focal Point):

  • Straight ahead, eyes on the horizon.


Images:

  • Feel a cat tilt in your back.

  • Inner thighs hold you in pose, this comes from squeezing your inner thighs together and everting the feet.

Modifications:
To lessen for beginners or injuries:

  • Malasana is a good indicator of a student’s ability to find this shape and a good warm up for the flexion of the hips required for this arm balance.

  • Tripod Headstand is a good place to start for an arm balance.

  • Lowering into Caturanga and raising up into High Plank helps build the necessary arm strength for this pose.

  • Lolasana, with or without blocks, strengthens the arms and abs for this pose.

  • Navasana helps strengthens abs.

  • Find the shape of the pose lying on your back. This will enable you to find the foot placement and allow them to feel how the knees squeeze.

  • Use a block under the forehead to be able to be on your arms and feel what the rest of the body is trying to do while you are in the pose.

  • Use a block under the heels to feel how to keep the body compact, heels and buttocks close together.

To intensify:

  • Once you can balance on your arms, begin to try to straighten the arms.

  • Bakasana push-ups strengthen the arms and train the body for transitions.

  • Bakasana to Sirsasana II and back to Bakasana.

Effects:

  • This asana strengthens the arms and abdominal organs since the latter are contracted.

  • Counters osteoporosis because it is a weight bearing exercise.

  • Strengthens the balance reflex and thus helps prevent falls.

Pregnancy:

  • Not recommended – strong abdominal contraction is required.

Contraindications:

  • Pregnancy

  • Wrist issues

Sequencing:
3 poses before – to prepare:

Adho Mukha Svanasana, High Plank, Malasana

3 poses after – to release:

  • Adho Mukha Svanasana, Uttanasana, Urdhva Mukha Virasana

3 poses after – to go further:

  • Sirsasana II, Eka Pada Sirsasana, Eka pada Bakasana

Personal experience:
This pose took me a long time to come to terms with.  First there was the feeling of falling on my face, which I did.  Then I could do the pose but couldn't stay in it.  Then came the period where I could reliably get into it and hold it. Crow is definitely about strength, but it is not just arm strength.  Most of the strength comes from your adductors: your ability to hug your knees into your outer arms.  Then comes the drawing in of the navel to the spine and the engagement of the pelvic floor.  The arm strength is more subtle as you have to find the balance, like a see-saw.  There has to be the same amount of weight in front of the wrists as behind them.  It is this delicate balance that helps you find the pose.  Perfecting Crow gives you a sense of independence and self-confidence.

Which pose helps us to grow old gracefully?

A Pose to Help You Age Gracefully

"We sit and walk as we think.  Watch any man as he walks down the avenue, and you can determine his status in life.  With practice, a finer discernment will have him placed socially and economically, and with a fair idea of his outlook on life.  We judge our fellow man more by the arrangement and movement of his skeletal parts than is evident at once."  – Mabel Todd, The Thinking Body.

The asanas in general help us to grow old gracefully, but Mr. Iyengar says that it is primarily the action of the spine that shows our age.  To help maintain the gracefulness of our spines we need to stretch and strengthen all of the muscles connecting to the spine.  In Light on Yoga, he says that Paripurna Navasana, or Full Boat Pose, and Ardha Navasana, or Half Boat Pose, bring life and vigor to the back and allows us to grow old gracefully and comfortably.

Let’s look at how to come into the pose:

To come into Full Boat Pose: Start in Dandasana, or Staff Pose.  Place the palms on the floor next to the hips and slightly behind them with the fingers pointing forward.  The back is erect and the chest is lifting.

On an exhale, Lean back so as to raise both legs simultaneously from the floor.  Keep the legs together, straight and with the knees tight.  Balance is maintained on the sitting bones without any part of the spine touching the floor.  In the full pose the legs are raised at an angle of about 60 to 65 degrees which should be higher than the head.

Boat Pose

If you can, lift the hands from the floor and bring the arms parallel to the floor, close to the thighs.  The hands are level with the shoulders and the palms face each other.

Stay in the pose for half a minute with normal breathing.  Gradually increase the time to one minute.  However, you will begin to feel the effects of the exercise after only 20 seconds!

To come into Half Boat Pose:  You start, again, in Dandasana.  But this time, you interlace your fingers behind the back of your head, above the neck.

On an exhale, recline the trunk backwards and simultaneously raise the legs from the floor, keeping the knees tight and the toes pointed.  As in Full Boat, the weight of the body rests on the buttocks and no part of the spine should be allowed to touch the floor.  You will feel the muscles in the abdomen and low back engage.

The legs are maintained at a lower angle of about 30 to 35 degrees and are in line with the head, not above it.

Ardha-Navasana-4-x-6-web-large.jpg

This pose can be held for 20 to 30 seconds.  A stay for one minute indicates strong abdominal muscles.

Make sure you do not hold your breath in either of the Boat Pose variations.  If the breath is held, the effects will be only on the stomach muscles. If the breath is too deep, you will lose the engagement of the abdominal muscles.  The technique is to inhale, exhale and hold briefly breathing only into the upper chest.  Breathing in this way not only tones the abdominal muscles, but it will tone the organs as well.

The effects on the organs of Paripurna Navasana and Ardha Navasana differ due to the position of the legs.  In Full Boat the effect is on the intestines, in Half Boat the liver, gall bladder and spleen are affected.

In the beginning, if the back is too weak to bear the strain of the pose, modifciatons can be used to build strength.  These include keeping the hands on the floor, bending the knees, only raising one leg at a time, or using a belt to hold onto the feet.  When the power to stay in the pose comes, it indicates that the back is gaining strength.  A weak back is a handicap in many ways.  These two variations of Boat Pose coupled with twisting poses will help strengthen the back.

In the section on the effects of Boat and Half Boat, Mr. Iyengar concludes with this observation:  “The importance of having a healthy lower back can be realized if we watch old people when they sit down, get up and walk, for consciously or unconsciously they support their back with their hands.  This indicates that the back is weak and cannot withstand the strain.  As long as it is strong, it needs no support, one feels young though advanced in age.  These two asanas bring life and vigour to the back  and enable us to grow old gracefully and comfortably.”

P.S. As I am currently struggling with low back pain, I can testify to feeling old and not so graceful.  This Pose has become too difficult to do.  But rather than skip it, which is the natural tendency, I can work on modifications to help me work towards strengthening my low back and my core.  Often it is the poses we avoid that are the ones that can bring the most balance to our bodies.  The trick is to find a modification that makes it accessible.  Here’s a variation I found that helps with Navasana that can be done sitting in a chair:

Sit on the front edge of a seat with your knees at right angles. Grab onto the sides of the seat with your hands and lean slightly forward. Firm your arms and lift your buttocks slightly off the seat, then raise your heels slightly off the floor (but not the balls of your feet). Let the heads of your thigh bones sink into the pull of gravity and push the top of your sternum forward and up.

Pose of the Month - Head Stand

It is important to be somewhat proficient in some basic yoga poses before attempting to learn Head Stand. These poses should include:

• Triangle
• Side Angle
• Warrior I, II & III
• Down Dog
• Wide Leg Forward Bend
• Pyramid
• Half Moon
• Tree
• Boat
• Cow Face
• Bridge
• Shoulder Stand

In addition, there is a fair amount of core strength. Can you hold Boat Pose, Plank, Side Plank and Reverse Plank for 30 seconds to a minute in each one? Being able to do these poses is no guarantee that you can do Head Stand, but they will help you find and keep your core engaged while you are upside down. It is important to hold the body firmly and to be able to maintain vertical extension even while standing on your head.

Preparation

Before you think about doing Head Stand, you should prepare your body for an inversion by doing poses that get your head lower than your heart. This is to make sure that there is not a sudden and dramatic change in your blood pressure. Here is a simple sequence to do this: Child’s Pose, Down Dog, Standing Forward Bend and then Head Stand, unless you need some shoulder stretches in addition. Cow Face Pose is a great pose to open the shoulders in preparation for Head Stand, even if you only do the arms.

Space

Make sure you have a wall that you can kick up against. And if you are newer and feeling a little precarious, a corner in a room is a very secure way for new students to experience this pose.

Mat

It’s nice to have a cushion for your head when you do headstand. I usually take a thin mat and fold it in half and then in half again. This is about the right size for your arms and head in this pose. If your mat is too thick, you can use it flat or maybe just in half. You want padding, but you do not want your surface to be too squishy as this makes it harder to balance. Also, if you have long sleeves, roll them up.  You want to make sure that your elbows don't slide out while you are in the pose; skin to sticky mat is best.

The foundation in any yoga pose is that part that touches the floor.

The Head

Knowing what part of the head is on the floor is important for the integrity of our neck in particular and your spine in general. The spot is right at the top of the crown of your head. It’s right where you would try to balance a book. A way to find it is to place the heel of your hand at the bridge of your nose, keep it there and stretch your fingers up and over the top of your head. Right where the tip of your middle finger touches your head, that’s the spot.

Screen-Shot-2019-02-25-at-11.57.07-AM-300x300.png

Arms

From a kneeling position, place your forearms on the floor so that your elbows are directly under your shoulders. There are ways to measure this, but it is important to learn to look, see and feel it for yourself. Stretch the forearms forward and clasp the hands, interlacing the fingers. Remember to keep your elbows under your shoulders and don’t let them wing out. This will cause you to put too much strain on your neck. Sometimes it may be necessary to belt the elbow if they keep winging out. Make sure that you alternate which way the fingers are interlaced each time you do Head Stand.

The part of your forearms that should be on the floor are the long bones that go from your elbows to the pinky finger sides of the wrist. The wrist bones should be stacked vertically. Look to see that the bump on your wrist at the thumb side of your hand is directly above the bump that is on the pinky finger side of the hand. Most students squeeze their hands so tightly together that the fingers turn white. Try to keep your hands relaxed. Instead of gripping the fingers, try to press down evenly along the entire length of your forearms from the elbow tip to the wrist. This will help you balance and take pressure off of your neck by putting it into your arms.

Stages

The first stage is called Dolphin. This is “Head Stand” with your forearms and head on the ground as if you were going into the full pose; your hips are in the air but your feet stay on the ground. Keep walking your feet in close to your head as you press your forearms into the ground. As you walk your feet in keep lifting your hips higher and higher. This can be done in the middle of the room.

The second stage can be done against a wall. Be close enough to the wall that your knuckles are touching the wall. If you are feeling particularly insecure about this, find a corner to practice in. Do everything from the previous stage, but keep walking your feet in toward your face. Keep the hips lifting until you feel your feet start to get lighter and lighter. Try to push with your feet until you can bend your knees and draw them into your chest and allow your feet to come off of the floor. Imagine you are trying to balance on your head in “Child’s Pose”. This requires core strength to hold you up.

After learning to balance in the previous version, you can start taking one leg up at a time. Once you get used to being upside down, be aware of what you are doing with your legs. Practice all of the same actions you do in Tadasana: Hug your legs toward the midline; roll the thighs in, back and apart; Sit bones reaching towards the heels, pubic bone lifting towards the head; inner ankles together, heels slightly apart; knees lifted, feet “flointed” (feet pointed, toes flexed back).

Once you become comfortable in Head Stand at the wall, then you can begin to move away from the wall. The first stage is one knee length away from the wall. This way you are far enough away from the wall to try to balance, but close enough so that you can bend a knee and touch the wall safely with your foot.

If you can balance a knee length away from the wall, the next step is in the middle of the room. Unfortunately, it starts to get unsafe to simply keep inching away from the wall. If you are farther than your knee length and you start to go over backwards, you can crash your knees into the wall and hurt yourself. Not fun!

The first couple of times you practice in the middle of the room, if you don’t have a spotter, just try coming up into the Child’s Pose variation. Again, this is a great core strengthening position! Once you feel confident you can try reaching one leg up at a time.

Everybody falls out of Head Stand occasionally. It is helpful to have a contingency plan if this happens. It can be scary but it’s often not as bad as you feared. If your feet fall towards your face, this is not falling out. It’s when your feet go over backwards. If you have the presence of mind, tuck your chin, release your interlaced fingers and just try to roll out of it. (Again, if you are too close to a wall, this could be painful.) Tucking your chin will keep you from falling flat on your back. Often it is the sensation of your interlaced fingers getting squeezed hard that is the most painful thing about falling out of Head Stand. Some people try to minimize the damage of falling out of Head Stand by practicing on a carpet. But, just like having a too thick mat, the squishier the foundation is, the harder it is to balance.

Remember to rest in Child’s Pose for a period of time proportional to the amount of time you spent in Head Stand before coming up. Head Stand should usually be counter posed by Shoulder Stand although it doesn’t have to immediately follow Head Stand, it just needs to be done before that practice session is over.